
Traveling solo through the Springlands Hollow Halls in Enshrouded? Find all of the secret recipes in the Halls with our complete guide!

Find The Hollow Halls: Go West!
What Is The Springlands Hollow Halls?
The Springlands Hollow Halls is a labyrinth of challenges and puzzles for players to finish to get prizes and rare artifacts in Enshrouded similar to its Ancient Spires. These Hollow Halls are also home to the most terrifying mobs and monsters to slay!
Starting Point
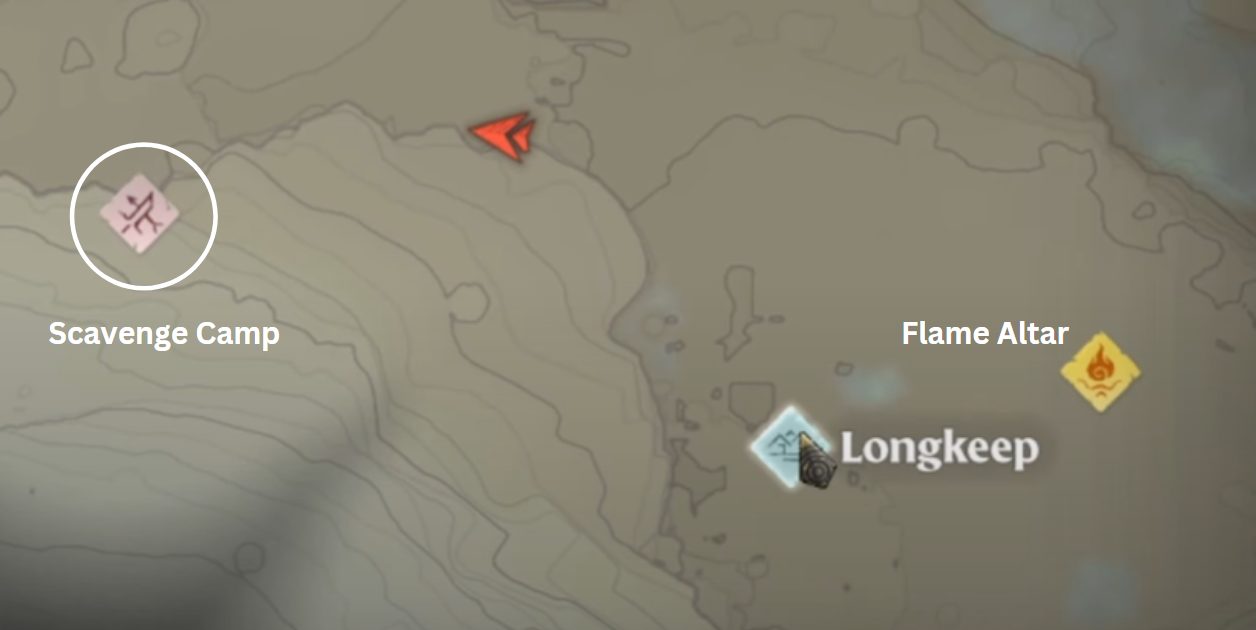
For our first step, we will begin at the best starting point for this journey to get to the Springlands Hollow Halls. For our starting point, we have used our own Home Base closest to the first Flame Altar of the game. From there, we will head West. To make it easier, we will use a few landmarks during our travels to make it easier to know our way. An image is pasted below for better reference.

It’s okay if you don’t have a base located near the Halls like ours. In this case, we’ll just use the Flame Altar marked in the image above and then, follow the markers we have placed.
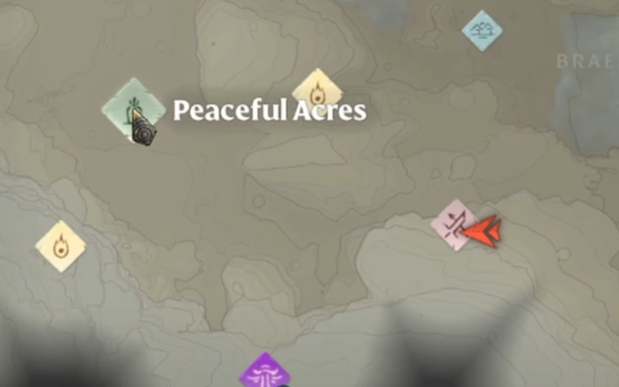
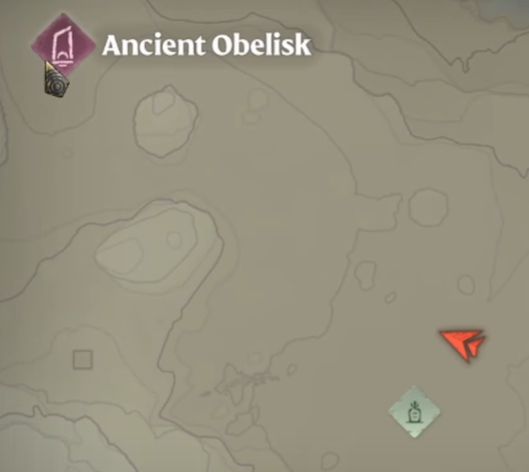
Locations you’ll need to pass through to get to the Springlands Hollow Halls. Follow them in this order and don’t forget to click on them to view the images:
- Longkeep
- Scavenger camp with Mineshaft
- Flame Altar West of the scavenger camp
- Peaceful Acres
- Ancient Obelisk West of Peaceful Acres
- Springlands Hollow Halls South of the Obelisk
Springlands Hollow Hall
Beginning
Now that we’ve successfully located the Springlands Hollow Hall, it’s time to get into the real mission! Open the door and enter the Hollow Hall. From there, you should be able to see a table down the hallway from where you’re standing. Run to it and grab the note.


Once you’ve got the note, run to the side stairs and proceed to the next hall where you are to fight a couple of monsters. After killing the mobs around you, proceed to the teleporter nearby.

Springlands Hollow Halls: Barrier 1
You’ve stepped into the hollow teleporter. Great! Now, to begin, you will be transported to a chamber where there are bits of loo that stand out such as potions. Take a look around and make sure you pick up each one. You may need them for the next stages ahead.


After looking around the first chamber, you may proceed to open the gate. There, look around once again and pick up as much loot as you can.

In the same room, you’ll find an Anvil to get your tools and weapons repaired before every stage. This is so that you won’t be inconvenienced by tool breaks during battle so be sure to repair your items! In every checkpoint room, you’ll find a repair station.

When you’re done with your preparations on items and weapons, proceed to the lower area where you’ll face several enemies. Remember, keep your potions and food at the ready! Wipe out the skeleton enemies and then you may proceed.

Then, at the end of the hall, there should be a staircase with green smoke. Get up the staircase and jump into the smoke. Then, look up and grapple to the higher platform and again, jump into the green smoke. This will then unlock the first barrier and you may proceed.


Bonus Items In The Springlands Hollow Halls
After unlocking the first barrier, pass through the door and run down the hall. When you see Skeleton mobs running in a straight line, don’t worry, just run past them as well and open the door ahead of you. When you’ve passed them, go ahead and open the door. This door will lead you to a tomb chamber.


You may get treasure from the tombs such as Ores and other goodies or Ectoplasm Fragments.

Continue On The Springlands Hollow Halls
After you’ve gotten your items and your potions, proceed to the next chamber. Exit the Tomb Room and take a left. Prepare your weapons and your health potions! This will be a hard battle. In the Springlands Hollow Halls, make sure you’re always on your feet for any horde coming your way!

Once you get to the end of the hall, fight through the incoming skeletons to get inside. There will be a lot of them so stay cautious.

Once you’ve fought through the horde of Skeletons, proceed forward and turn left, move forward a bit, and then take another left. This should lead you to a chamber with some skeletons to take down and a gateway to the next stage.

In addition, located above the staircase as seen in the image above is a repair station for your tools and armors! Be sure to patch up your items before proceeding to the next stage.
Springlands Hollow Halls: Barrier 2
When you enter the chamber, remember to look around the area for useful items such as food and potions for your next journey. These’ll be a great help!

After gathering your desired items, let us proceed further. Open the gate and then run into the next hall and turn left to read the note on the table. Clear the several skeletons as well.


The barrier hasn’t opened yet? This means that you have a few enemies left to take down. When looking towards the book, take a right to an empty hall. This will spawn the last enemy and unlock the barrier. Take the enemy down and from the hall, and pass through the barrier on the left (the hall facing the book you just read).


Springlands Hollow Halls: Barrier 3
Soul 1
At the end of the hall you’ve opened there is a hole in the ground. Look down and prepare to use your glider carefully. In the chamber in this Springlands Hollow Halls, there are 6 total souls to collect to open the barrier and proceed to the next chamber. Try to land on the right upper platform on the sides of the chamber to take the first soul. This way, it’s easier for you to take it from the beginning. Refer to the marked images below for better references.


Soul 2
Once you’ve gotten the first soul on the platforms, we move on to the next. From the platforms, jump down and head down the stairs. You may have to fight a few skeletons so be ready. Right off the bat, when you go down the stairs, you should be able to see the souls on the chained platforms. Approach them and claim them. We have also included a soul counter in the images to make things easier!


Soul 3
For the third soul, it is located right in front of soul 2. However, you’ll have to carefully jump across the broken bridge to claim it. Mind your step!

Soul 4
Once you get the third soul, head for the 4th soul. To do this, jump back, look to your left, and look up. There is a grapple spot there. Use that to head up the wall. Refer to the following images.


From there, turn right and you should see the 4th soul good for the taking. Take down the bat enemy first and you’re good.

Soul 5
On the same platform you’re on, run to the end of the hall and look right. There, you’ll see the platforms you landed on at the beginning of the soul hunt. The reason why we didn’t take the soul on the platform in the first place is that it’s easier to take it in our order! Go ahead and glide down to take the soul.


Soul 6
The 6th and final soul for the 3rd barrier of the Springlands Hollow Halls is located right under our noses! To get to this soul, from the platform where you got Soul number 5, jump down and look behind you. There, you’ll see a lower chamber. Carefully make your way down and watch your step.

Once you drop down, drop down once again and turn right. You’ll be able to claim the 6th soul and open the barrier there. When you finally catch the soul, grapple across the broken walkway and turn right. There, you’ll be able to climb back up and make your way to the main chamber.


Afterward, proceed to the hall in the distance when you’ve gotten back up the main chamber and open the gate. Then, we’re on to the next barrier.

Springlands Hollow Halls: Barrier 4
When you’ve opened the gate for barrier number 4, remember to take the checkpoint altar and prepare your tools at the anvil station before proceeding.

From the checkpoint and repair station, head right. There should be a set of stairs leading down, take it and turn left when you hit the bottom.


Head straight and into the hall. You should be in a chamber with doors right after. Run up the pile of bones until you reach the long hallway with spikes on the floor.

Once you reach the spike hall, carefully make your way across and take a left to another set of stairs.


At the very top of the staircase, there is a door with its corresponding switch. Press it and open the door to the next chamber.

Repair Station
Enter the room and to your left. there is an important note. Be sure to read it for a while before we continue. When you’re done reading, take the hall facing the table and open the gate. You have a repair station and your next checkpoint in the next room.


Onwards
Be cautious, there will be a lot of enemies ahead. Once you’ve had your repairs, open the door across the room and go down the hall.

Then, from the halls, take a turn (left or right), go down the stairs, and go forward.

Then, run into the large chamber ahead but be careful! In this stage, you will have to go around and eliminate a lot of enemies and undead mobs. For this level of the Springlands Hollow Halls, we highly suggest that you use magic damage to keep yourself at a good distance while dealing decent damage. This way, you avoid getting yourself hurt and maximize your attacks.
The Skeleton Horde


Fight through the horde of enemies and look around the place to snuff them all out! As seen in the image above, there is a whole chamber full of enemies to fight. Knowing this, prepare all your items and avoid staying still in one corner. This horde will swarm you! Don’t forget to check the whole room for enemies to take down. Fair warning! The other side of the chamber has a lot more enemies to take down and more powerful bosses to fight. so it is best to use ranged magic for this part of the Springlands Hollow Halls.


Recommendations
It is best to use range magic for this battle to avoid getting hit by the Undead Soldier. This way, you maximize your opportunities to wipe them all out without dying and restarting. Magic is also more effective.
As mentioned, it is highly suggested that you use magic or ranged weapons as it is easier to get through this stage. This is also because there is quite a strong Undead Soldier that wields a Scythe that does quite a lot of damage! Be absolutely careful and keep yourself at a considerable distance.

Once you’ve taken them all down, well done! Now, let’s move on to the next item. To the left of the chamber, there is a room. Enter that room where you will see a chest, however, this chest is guarded by another Undead Soldier who will spawn and attack you from the left of the room. Raise your shield!
Silver Chest

WARNING: A soldier is guarding the chest so when you enter the room, be prepared.


After you claim your chest, exit the room and turn right to get back on track but keep on the lookout for more enemy spawns.
Exiting the Tomb


Wipe them all out and this will unlock the barrier for you to proceed then, enter the room you haven’t gone into (the room you see across from where you started). We’re nearing the end of the Springlands Hollow Halls!


Springlands Hollow Halls: Rare Tomb
You’re getting closer and closer to the end! Hang in there! Let’s continue on the final stretch to the Springlands Hollow Halls. Head towards the gate of the room you entered and open it. There, walk forward and you’ll see a rare tomb that you can loot for goodies, and there, your adventure into the Springlands Hollow Halls ends.

Sringlands Hollow Halls: The End
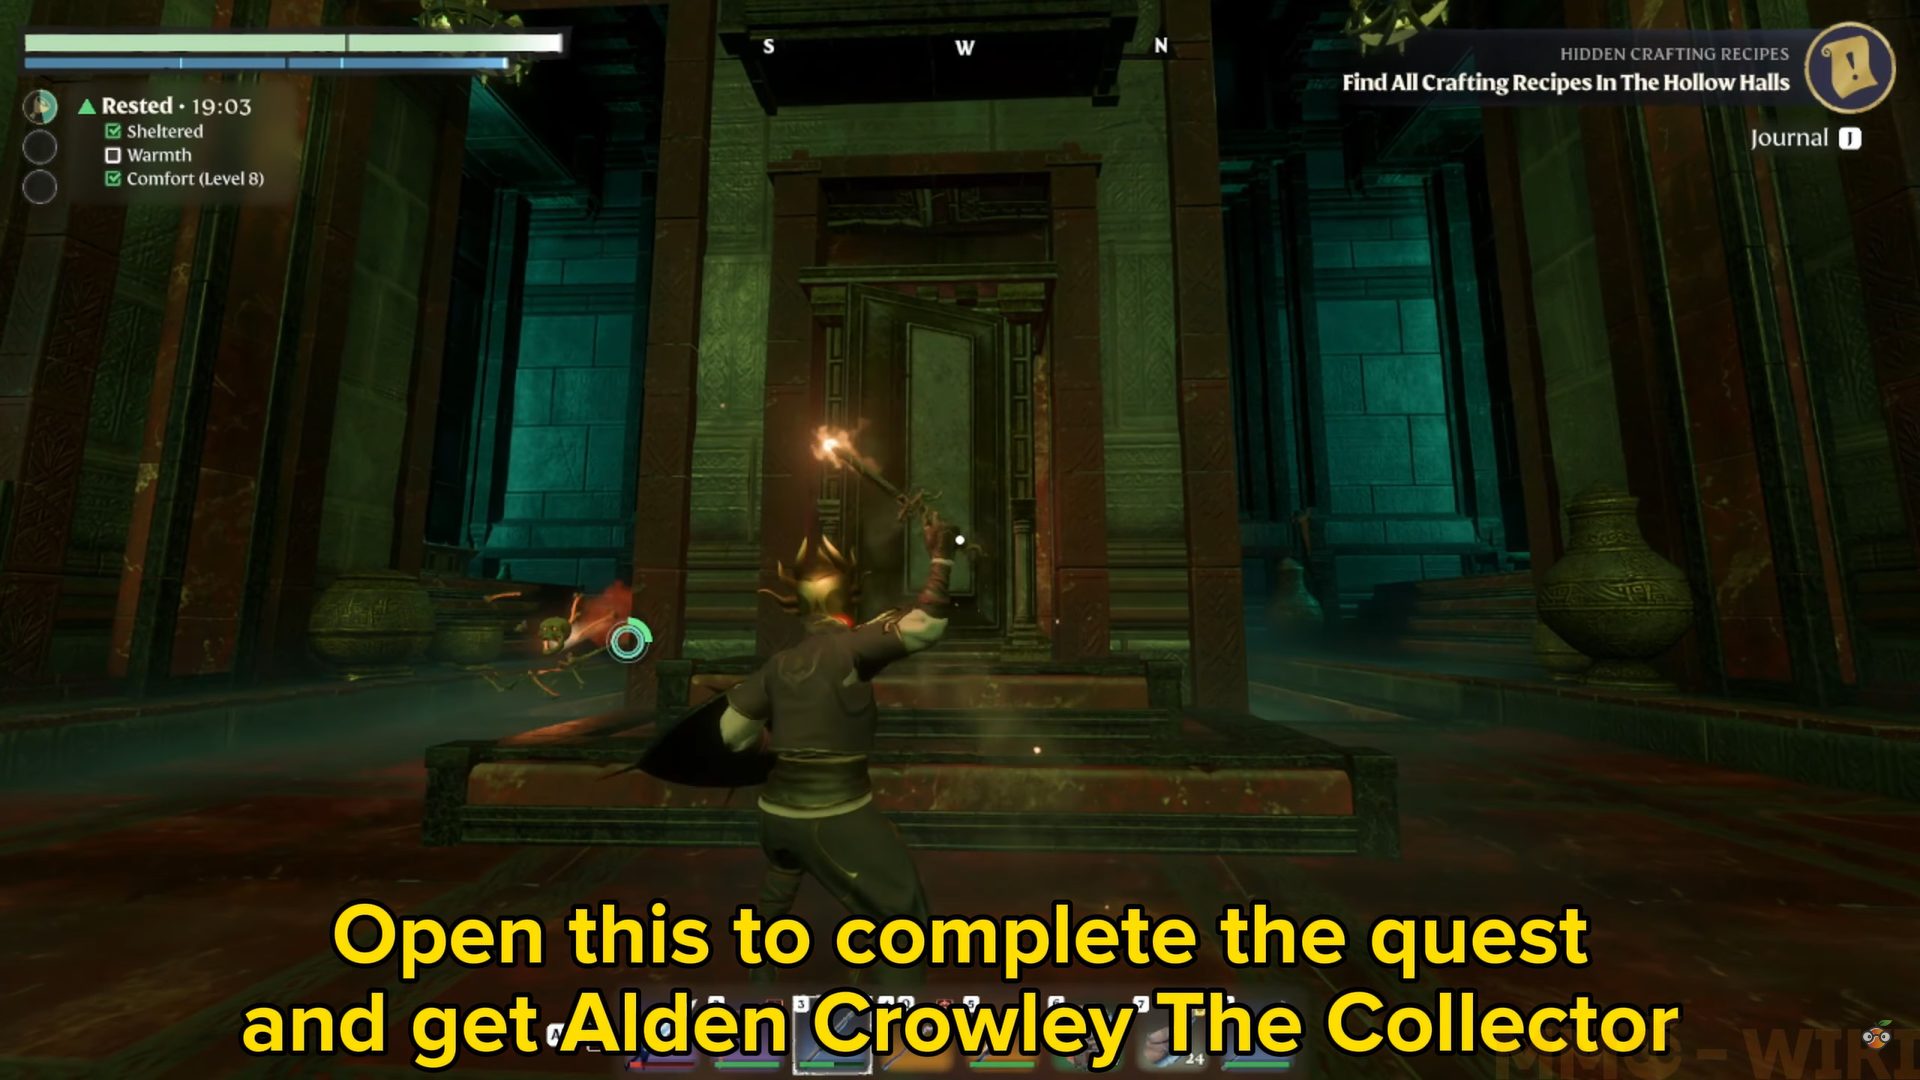
Alden Crowley The Collector NPC
After collecting your prize from the rare tomb, walk back out to the tomb on the wall and there, you’ll unlock Alden Crowly The Collector.
- Alden Crowley – He can upgrade your bone tools and weapons as well as offer you new recipes for decor and crafting.

Then when you’ve got Alden Crowly out, go back to the rare tomb chamber where the teleporter is now opened for you to use and to complete the Springlands Hollow Halls.
Springlands Hollow Halls Walkthrough Video
Much like Enshrouded’s Ancient Spires, the Springlands Hollow Halls offer you a lot of power in exchange for a great challenge. Get through them and you will achieve greatness!
Check out more like our Springlands Hollow Halls guide on our Enshrouded homepage for more content. Join our official discord channel!


